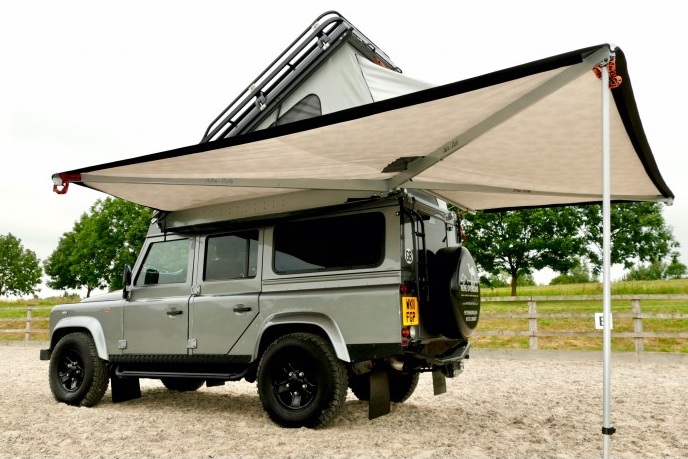
The All-Cab shadow awning attaches to the side of the vehicle and easily pulls out and around the back of the car – providing shade to the side and over the rear door.
Benita and I had always planned to get one of these, to the point that I had a conversation with Tuff-Trek last year about fitting it to the Perentie. I had a front roof rack and there was a question about whether it would foul the front support which sits in the gutter. I had a very helpful conversation with Dara King who in conjunction with their fitter, was sure it would work.
I thought no more about it for a while and then lock down happened. I then get an e-mail from Tuff-Trek to see if I was still interested. Well, I was, sort of – maybe – if I could do a deal……………
Well I did get a small discount and a free set of LED lights, but the upshot of my conversation with Dara was that once the current batch of Shadow Awnings were gone then who knows when the next ones will be available. They are manufactured in South Africa and they had been shut down since March – substantial price rises over the range were also in the pipeline – so I bought one, along with the roof bars; more on them later.
I had already decided to remove the front roof rack for repair and paint as it was rusting badly, so I did it now to make it easier to fit the awning. I could always amend the fitment of the roof rack later if needed.
Although we probably will not use the Awning camping this season, I figured that it would start paying for itself by providing me with shade when working outside in the Summer and shelter from rain in the Winter (in the Summer as well as it turns out!)
The awning arrived very quickly so I decided to get on with fitting it straightaway. There were no instructions in the box but a search on the Alu-Cab website turned up some very basic drawings of how the whole thing fitted. You Tube can be your friend in these cases, but all I could find was a guy trying to fit one to Toyota and having all sorts of problems – Great!
I have learned the lesson now, to sit and look and think, and think a little more before starting a job like this – nothing worse than drilling a hole in your All-Cab roof – in the wrong place.
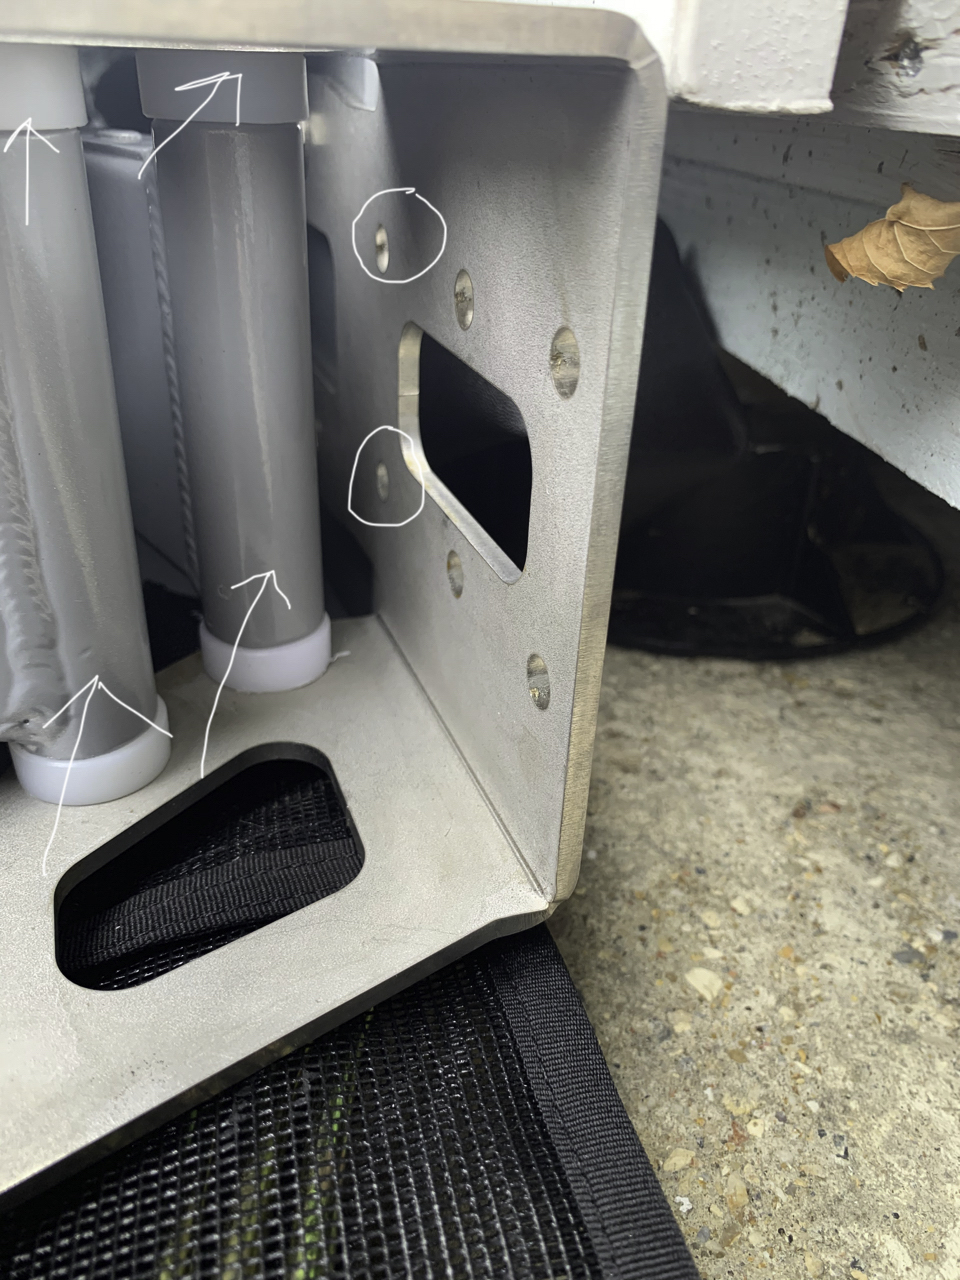
So first job was to fit the rear bracket on the corner to the left of the rear door (as my awning goes on the passenger side) – this entails removing the trim on the inside on the Alu-Cab roof – but by chance I had already done this to run some cables. The bracket can really only go in one place so it is easy to mark the holes using the bracket as a template and to fit the strengthener plates on the inside. I had already put the trim back on when I took the picture, so you can only see one.


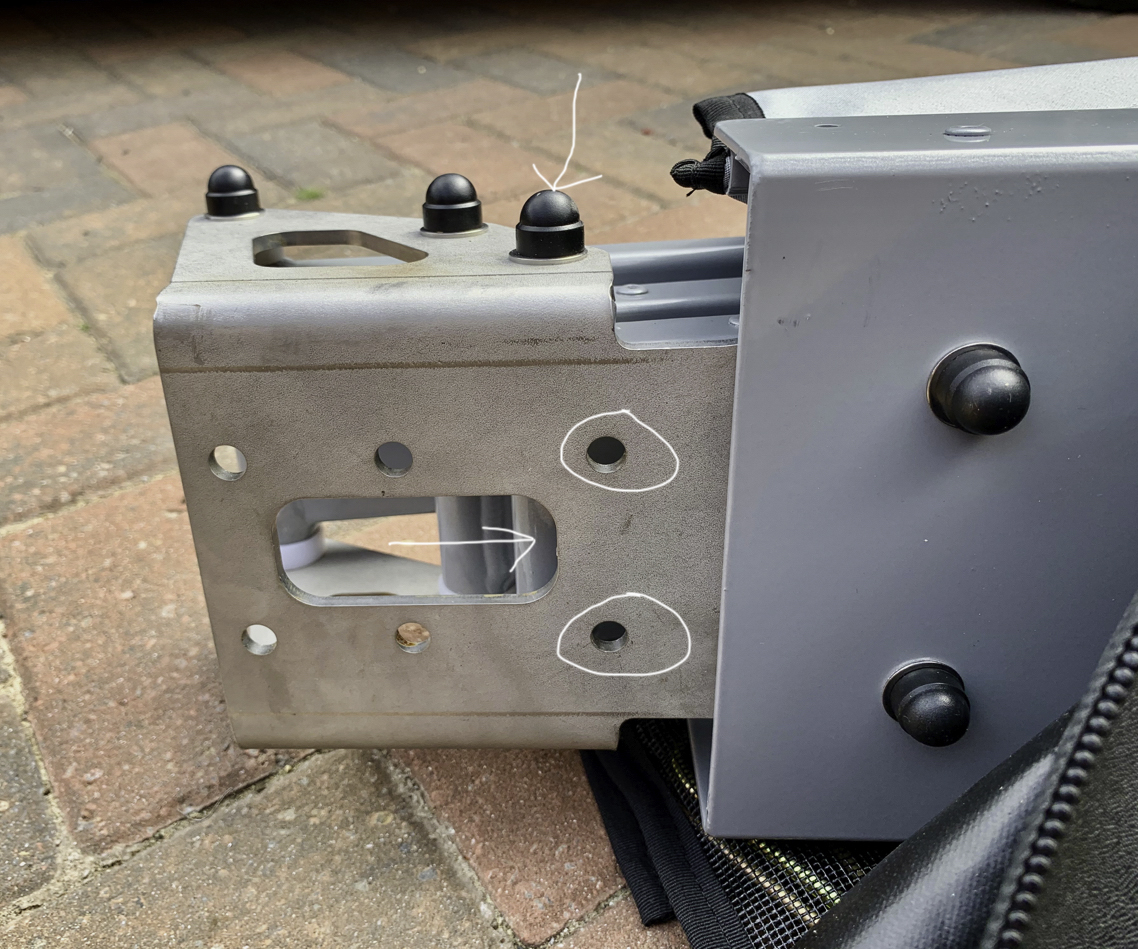
So, next you have to fix the second bracket to the awning itself. Then provisionally attach the awning to the rear bracket on the vehicle, so you can mark the position for the second bracket on the roof. Easier said than done as it weighs 28kg!
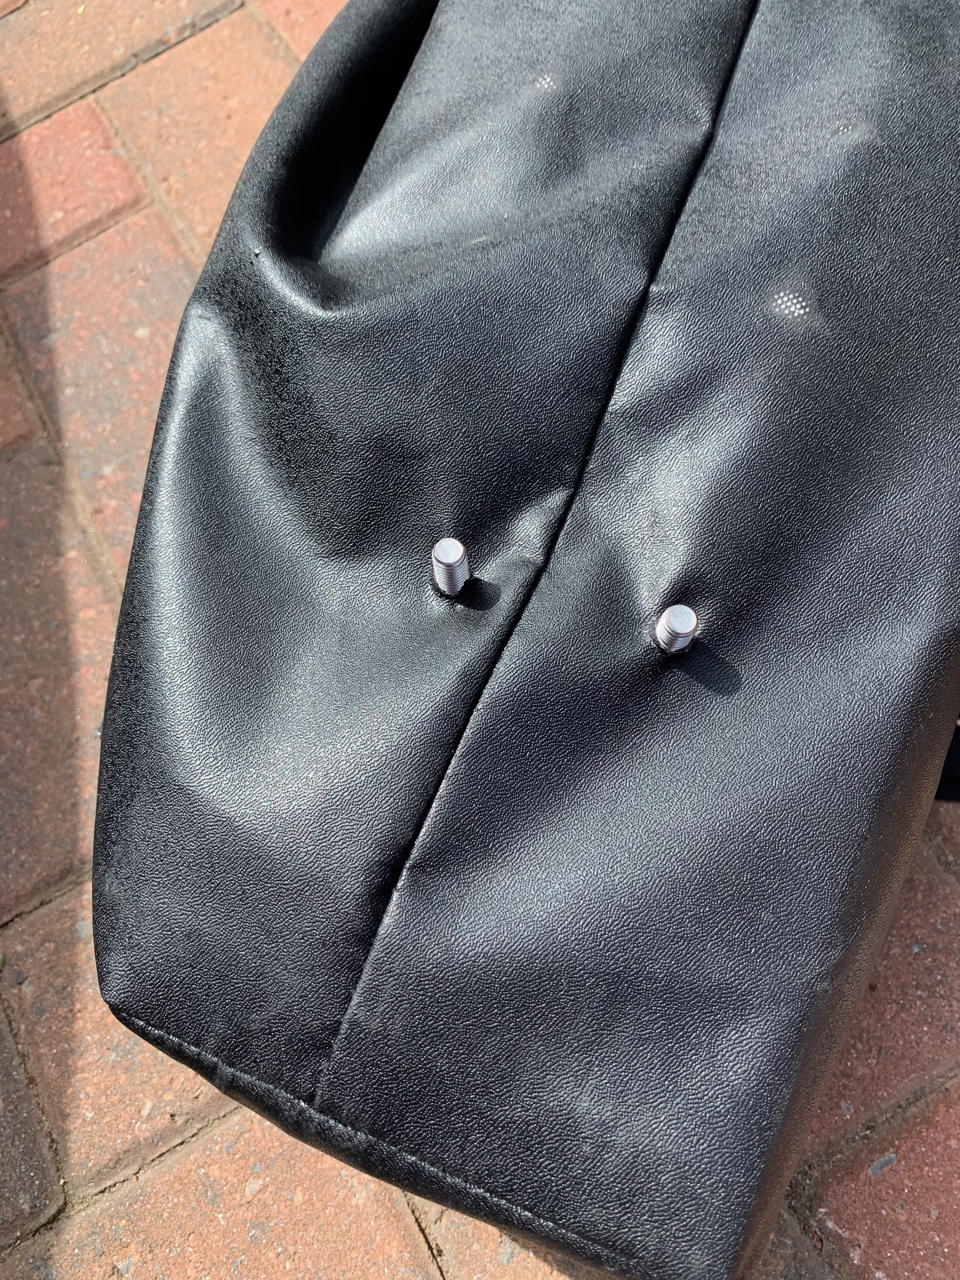
So this is where it gets interesting. You need to feed a bolt through awning backplate to fit the second bracket which you can just do – but they supply a pan head stainless steel bolt, so you can’t get on it, to tighten it. Turning to the rear, again you have to feed a bolt through the awning itself in order to secure it to the roof. However, you cannot feed a bolt through there either because the main struts for the awning are in the way. See below.
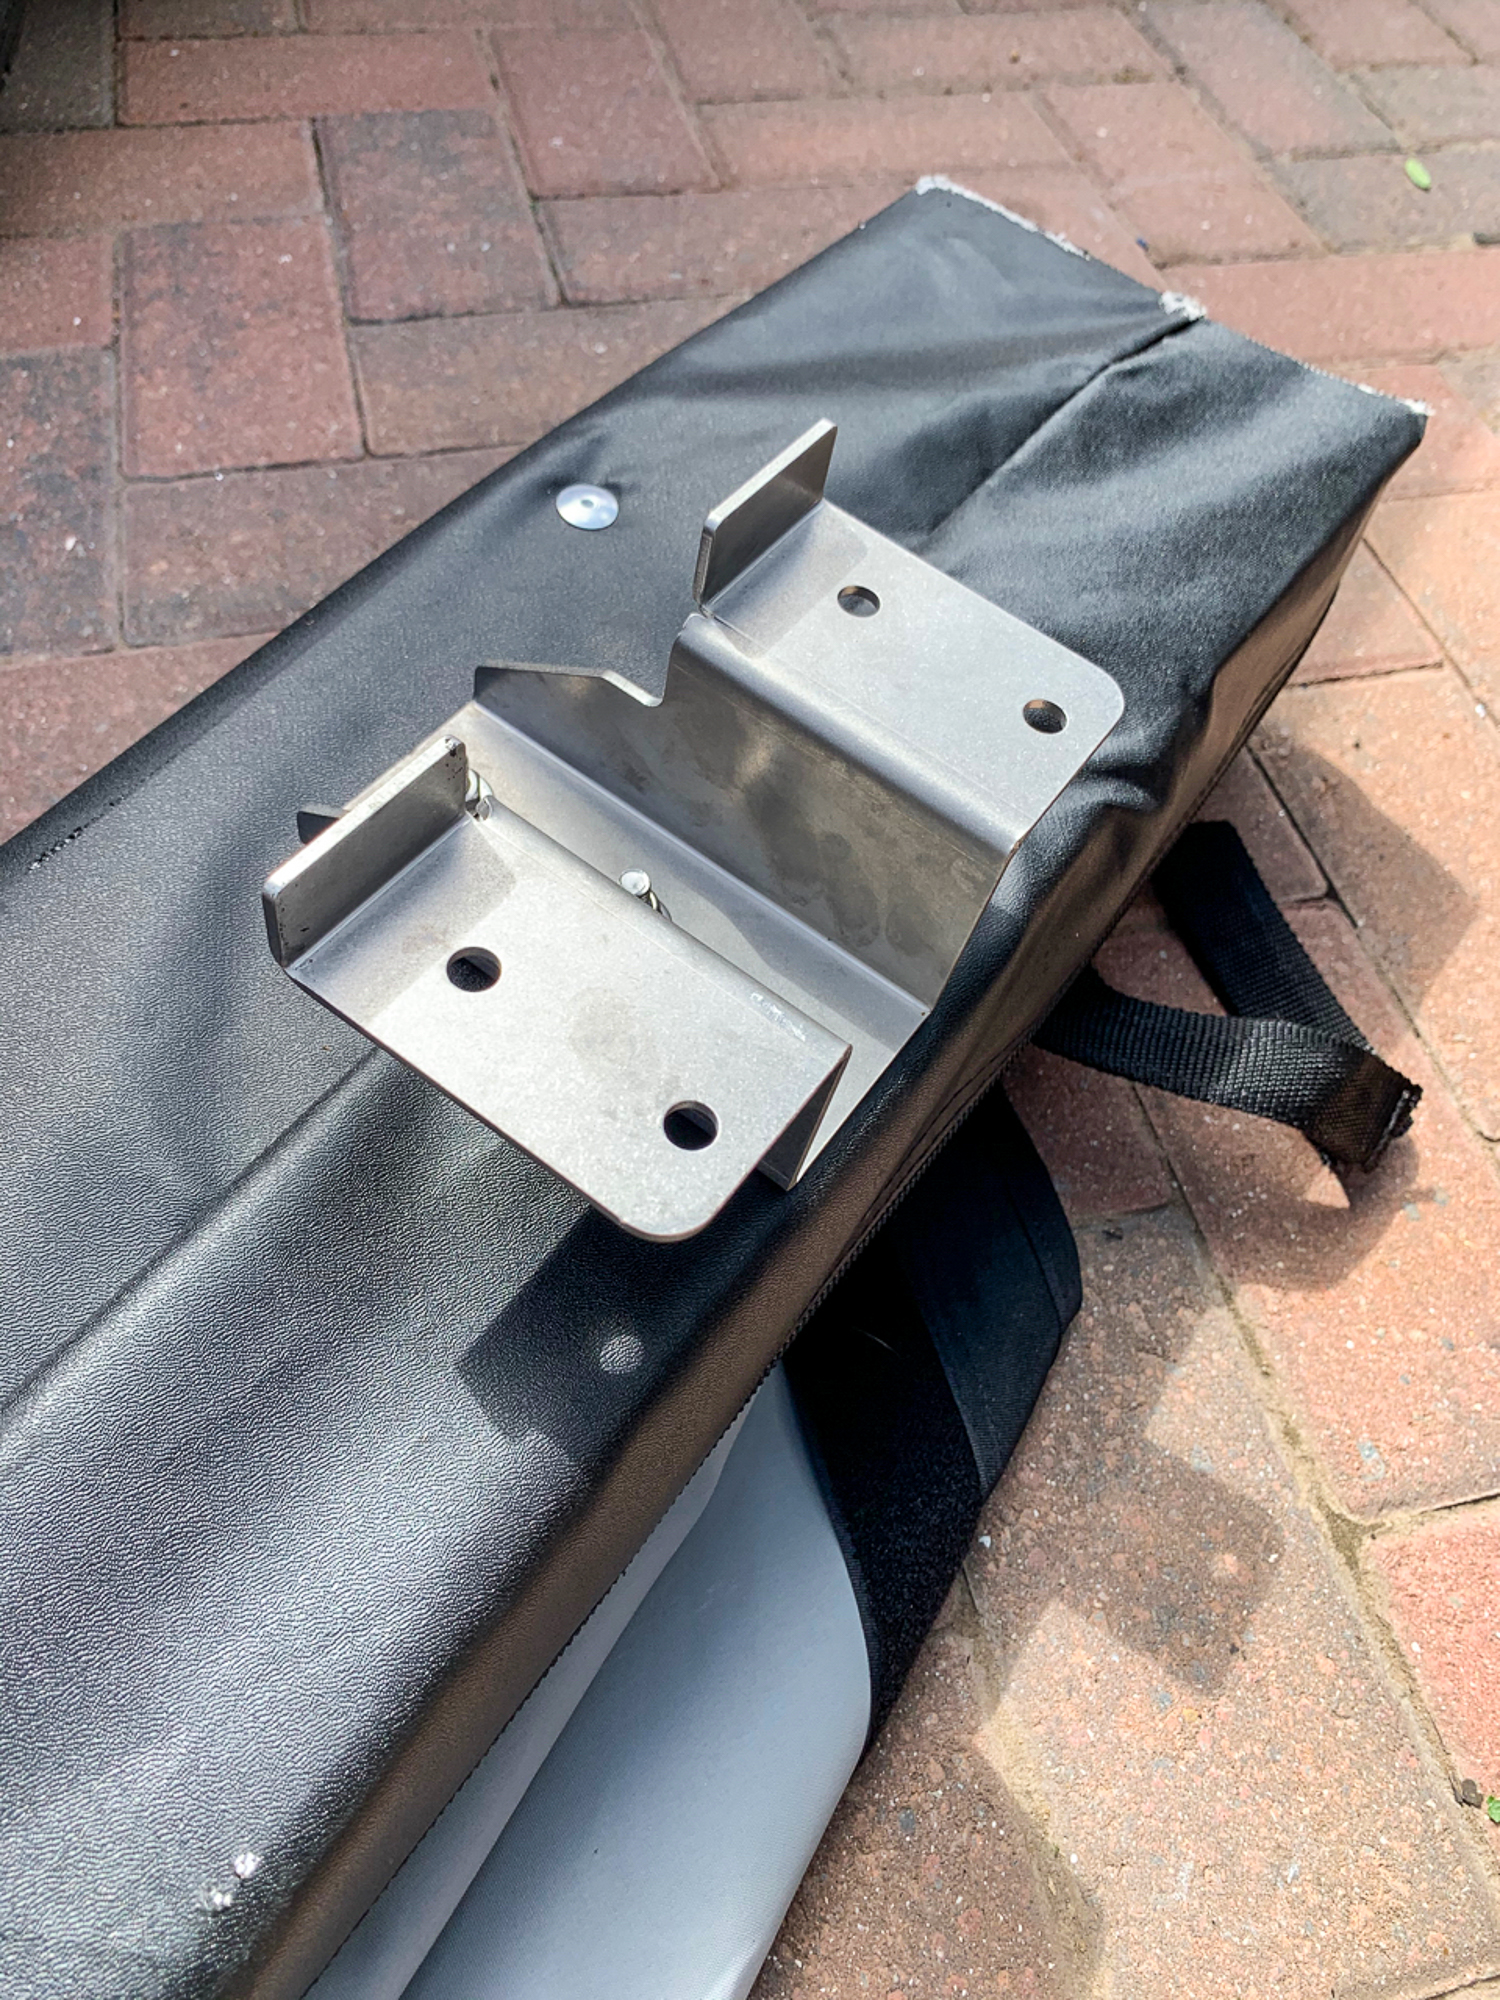
So, the only way forward is to unbolt the main struts, feed the bolt in and then put it back together again. Not before a trip to the local nut and bolt seller to get proper hex head bolts that you can get a spanner one them.
I wish I had a video of the next bit. I managed to lift the awning onto the rear bracket on the car and get a bolt in to hold it in place whilst my Dad held up the other end – I was a hot day and we did struggle. With the rear bolt in place, I helped Dad support the other end of the awning whilst marking the bolt positions on the roof of the car. I then had to remove the rear bolt so we could get the awning down.
My plan was to actually drill one hole only for the second bracket to start with, I was sure that if did them all at the same time that they would not line up – no matter how careful I was. Then with the awning in position secured with one bolt in each end, I would use the strengthener plate for the second bracket, to drill the other three holes from the inside – then they would be in exactly the right position.
So the plan was put into action, with the rear of the awning provisionally in place again, we set about trying to get the bolt through the second hole that I had drilled – virtually impossible to do from the outside when holding the awning and trying to see where to hole was…………….SO, we enlisted the help of Benita who sat inside the car and whilst we juggled the awning into position. When eventually everything lined up Benita pushed the bolt through from the inside. Once tightened up to get the position dead right, I drilled the other three holes, bolted it up and then reversed the bolt that was the wrong way around.

You have to remember to pass the rear bolts through the awning cover, it is too easy to miss this to start with as the cover folds back when you are working – missed this the first time we offered it up. You can also see the strengthener plate and the bolts from the inside.
You can see that I cut the interior trim panel, so that I can access the bolts , if necessary in the future. Once the internal cupboards are refitted, it would be very time consuming to remove.
Overall, a job well done and excellent teamwork.
And Yes, it does exactly what All-Cab claim, one person can set it up in a couple of minutes and it take just a little longer to put it away.
I will post a picture once it stops raining………..
