Now, I am no Plumber and I don’t like Plumbing – but what I do know is that water is not dissimilar to electricity in the way that it flows. Oh, and it won’t give you a shock or cause a fire………..
So I drew a plumbing diagram, like a wiring diagram.
I knew I needed a sink with hot and cold water and the same for a shower output. I just needed to get cold water to both and to the water heater and from the the heater, to the sink and the shower – simple….
Well it would have been if you were not trying to install it in a Land Rover, but at least I had a plan.
The water tank was going under the vehicle where spare wheel was mounted – the water heater would just fit into one of the side lockers. The filter and expansion tank would go into another side locker and the pump in a cabinet inside the vehicle – just need to connect them up…………
I decided to use John Guest fittings as they were east to fit and virtually leak proof when connected – once I worked that they do not work with standard (blue) water pipe we were away.
There are a number of options for heating water, most are designed for larger vehicles and run on gas; others heat the water from the engine and I did not want to run pipes (which would be vulnerable to damage) from the engine to a calorifier.
I sourced a small (6 litre) water heater from Surejust whch would just fit in the side locker. This unit works on 12v DCand 240v on an immersion basis. The idea being that you heat the water whilst travelling from a 12v DC circuit. The insulated tank then keeps the water at a reasonable temperature for 24 hours – we will see. With a hook up, no problem as the 240v supply will give us constant Hot Water.
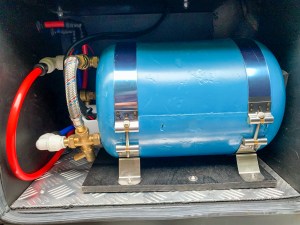
Surejust Water heater
The cold supply to the heater and the hot water (via an expansion tank) back had to run underneath the vehicle to prevent the drilling of even more holes in the vehicle.
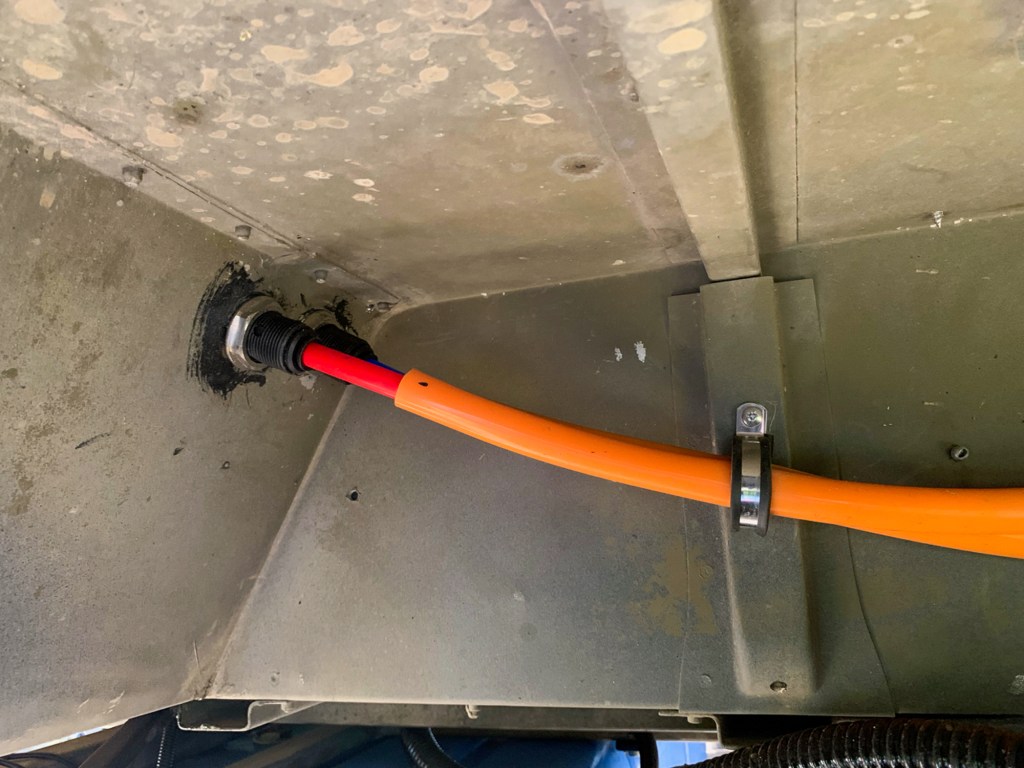
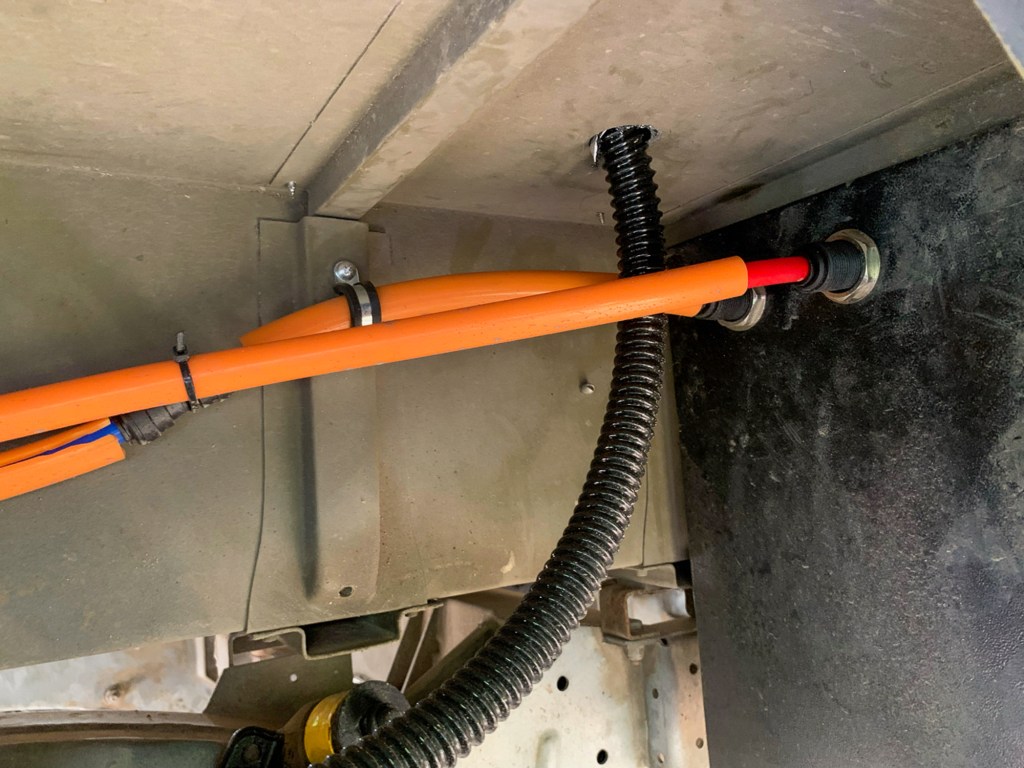
I used bulkhead fittings to get the pipes through the body, though this meant that the pipes were a little longer than I would have liked, as you need some slack to able to make the connnection. I learned the hard way as the first connections leaked and I had to make the pipes a little longer so they clicked in properly. They are nowhere near the wheel travel, so I should be OK.
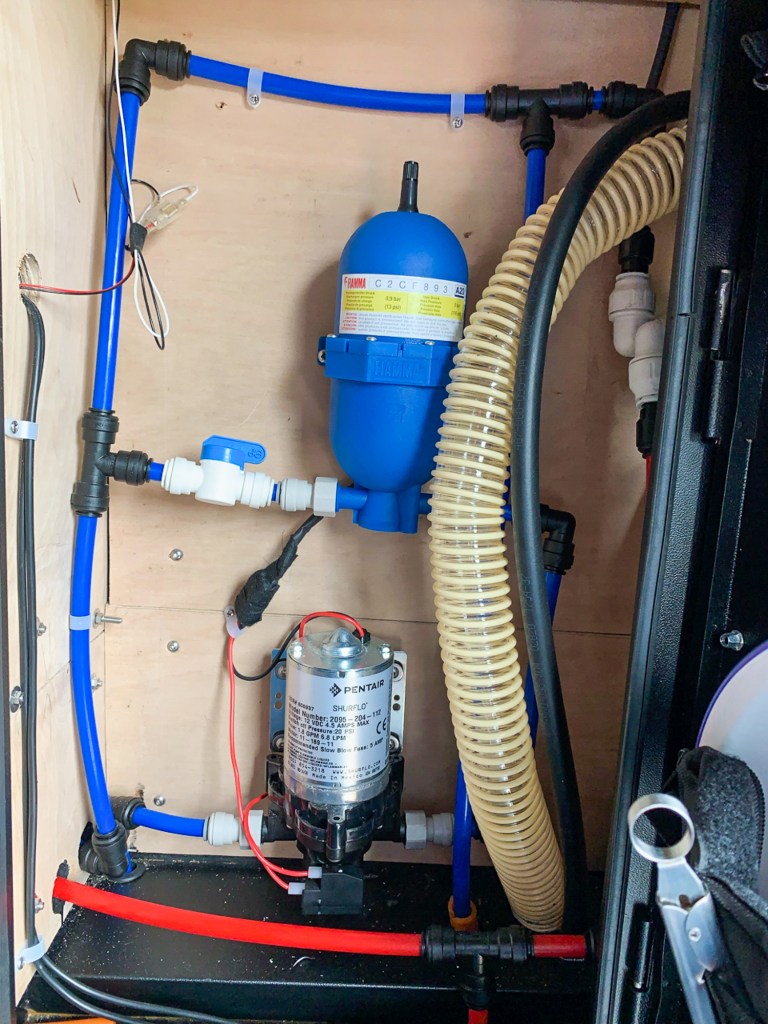
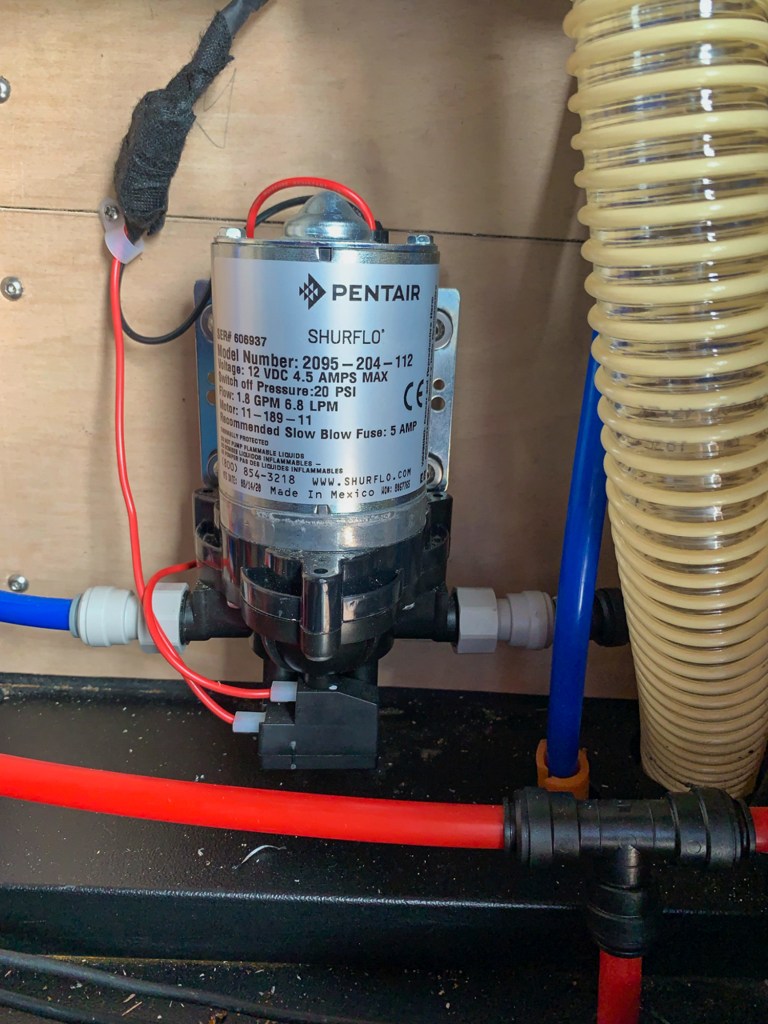
Inside, pipes were run up from the water storage tank into the pump and out via an accumulator tank to the sink/shower and heater. Likewise the hot return goes off to the sink and shower.
I went for a larger sink, so a least it would be of some use – no point if you can only fit a cup in it! – a nice stainless steel one from Amazon and a mixer tap with John Guest connections was sourced.
I am no carpenter either, but I managed a reasonable job of making a frame and a worktop – given that everything was a bit wonky and it was difficult to get a good fixing. This can aways be re-done in the Winter now I know the measurements.
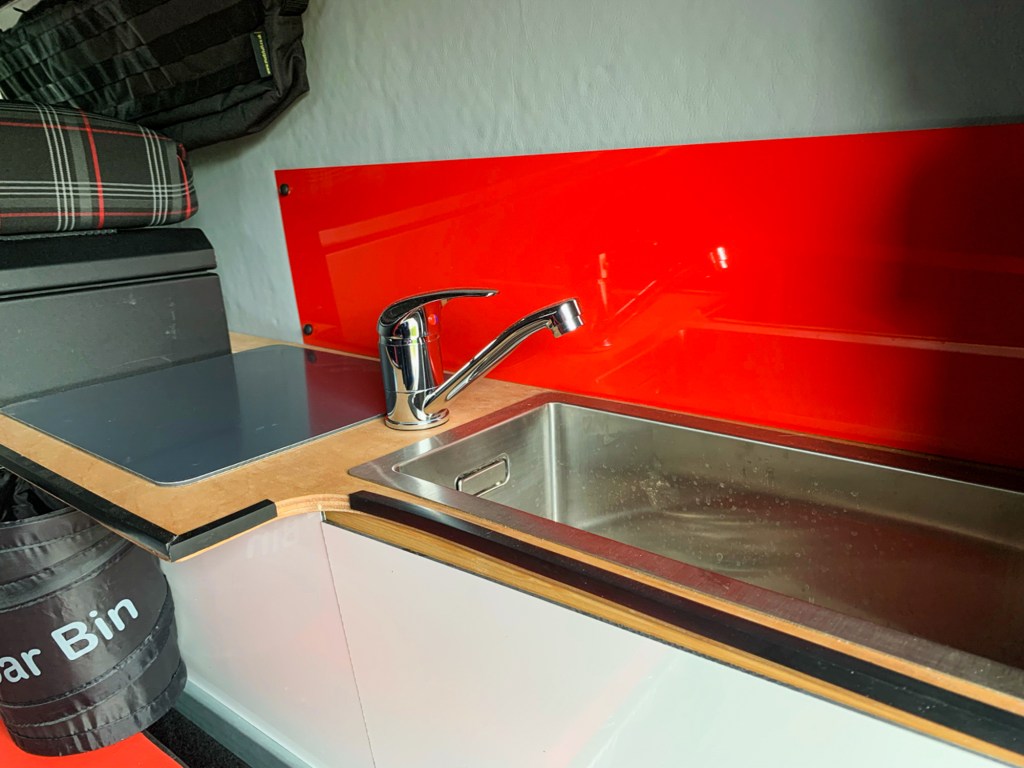
The splashback, worktop protection and the cupboad fronts which have magnetic catches are are an aluminium composite which can be ordered in exact sizes from Sheet Plastics.
The cupboard fronts were a pain, the first trial was with plywood, whch was too heavy – I then used these as a template for the composite.
When looking for a water tank, it turned out the standard Fiamma one fitted the space perfectly; I know its blue, but I figured that it would look worse if I painted it it, when the paint started to come off…………
I fitted the water tank one weekend using the metal straps supplied – then decided that it did not look right, also the tank had a tendancy to move slightly and I could not get it to tighten sufficiently.
When the vehicle was with Neil Read for the heater fit (more of that later) I asked him to make up some brackets for me – as usual he did a splendid job.
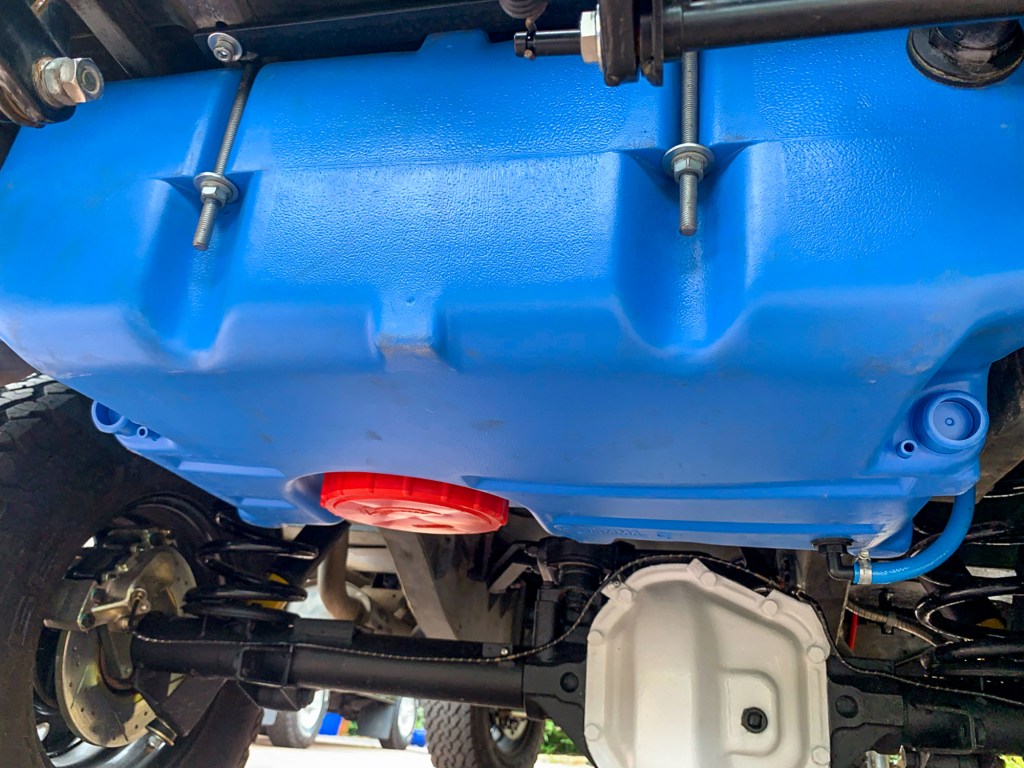
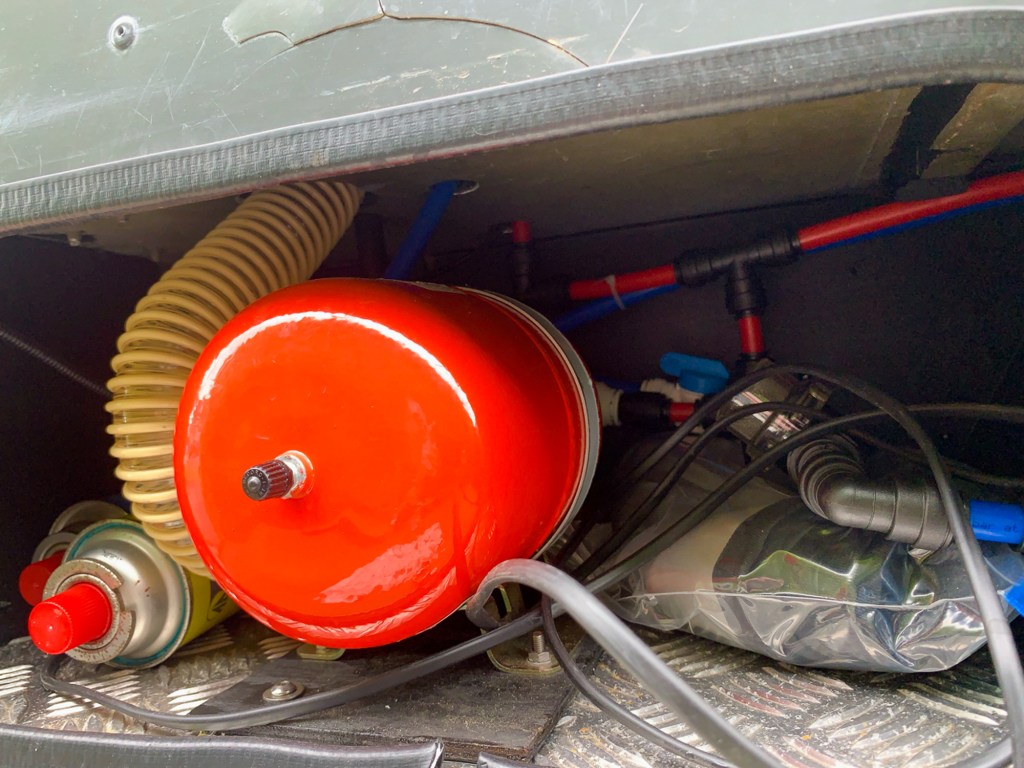
I purposely fitted the tank upside down so I could use the big red cap to empty and clean – this meant adding the nut-in fitting in slightly different locatiosn to the ones that Fiamma suggested. I also fitted a level guage and a heater, in case we encounter low temperatures a some point – maybe in America.

Wiring for the heater and level monitor. You can also see the fitting for the filler and the output at the bottom.
