Electrics – Getting there.

Phil and I worked together for about eight days on the car through January and February. We tried to get “rain free” days by carefully checking the weather and to a point we succeeded in achieving that. It was cold, especially first thing in the morning and at the end of the day, but overall the weather was not that bad. I would get on and do bits of preparation on the days that Phil was not there.

I wanted to get on rather than wait for better weather as I had planned to get on and landscape Benita’s garden in the early Spring and I had the time. Believe it or not, we were still unaware of the impact that Covid 19 would have on the way that we work together. We all got on well and Phil stayed over a couple of nights to save the long drive back and forth to his home. Benita who is a great cook would sort dinner and we would enjoy a couple of glasses of wine and some music as both of us play guitar. Those times now seem so far away as restrictions prevent us from enjoying the simple things in life such as each others company, conversation, jokes and music.

The Perentie is a very basic car when it was in service with the RAF and ours was fitted with an early TD5 dashboard when it was imported, in order to give it a proper key ignition for example.

I wanted to upgrade the dashboard so that I could use the better made Raptor Engineering dash binnacle in front of the driver. Raptor make a steel binnacle and front dash panel which replaces the plastic Land Rover one, you just need to source the screw in instrument light cluster and connections to the loom. I managed to find one on e-bay locally and drove to the other side of Bournemouth one evening to collect it. Ironically I put some of my spare parts on e-bay a few weeks later and they same guy turned up at my door after having purchased – small world!

Raptor also make a centre dash with many customisation options for gauges and switches which I am also fitting.

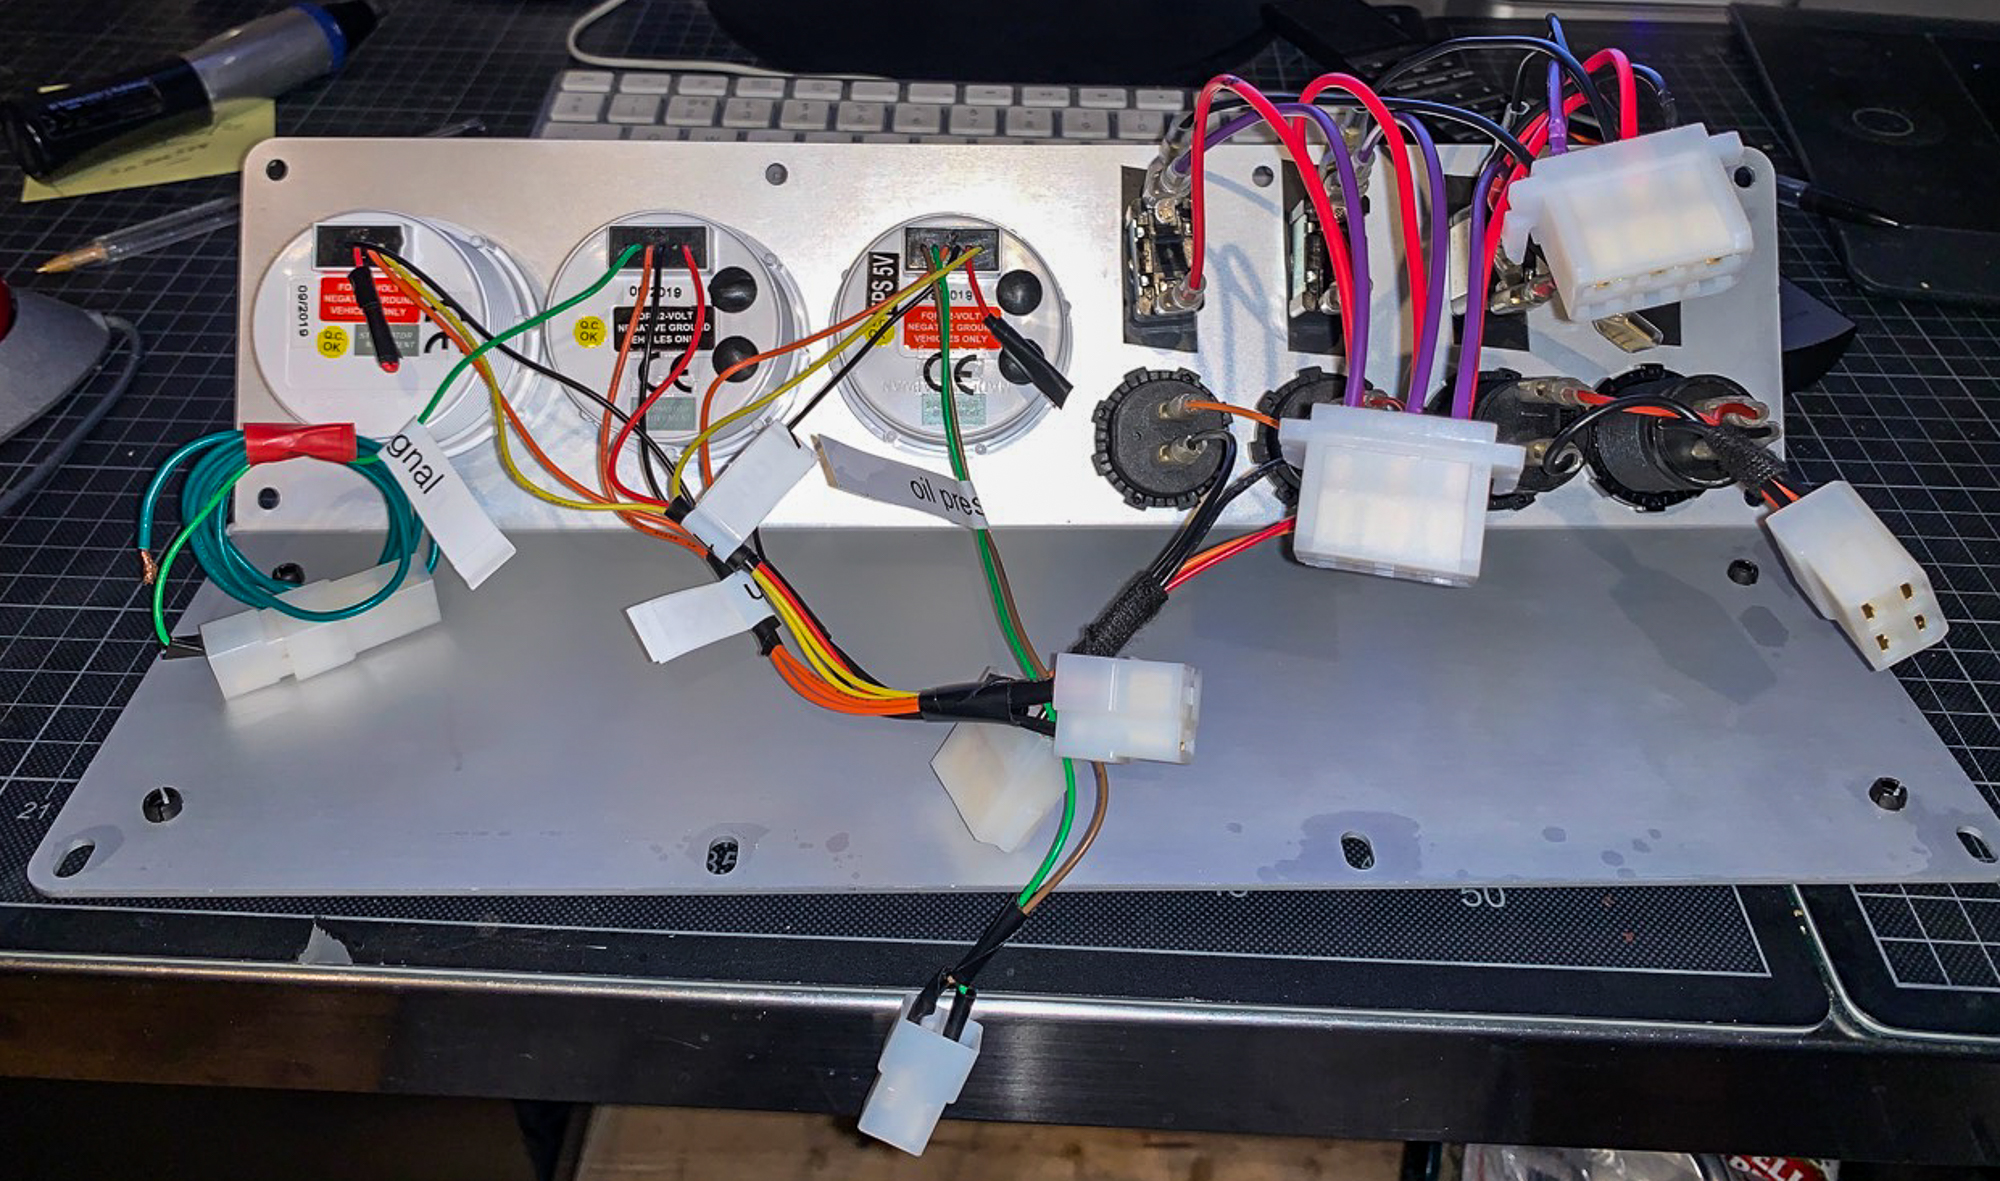
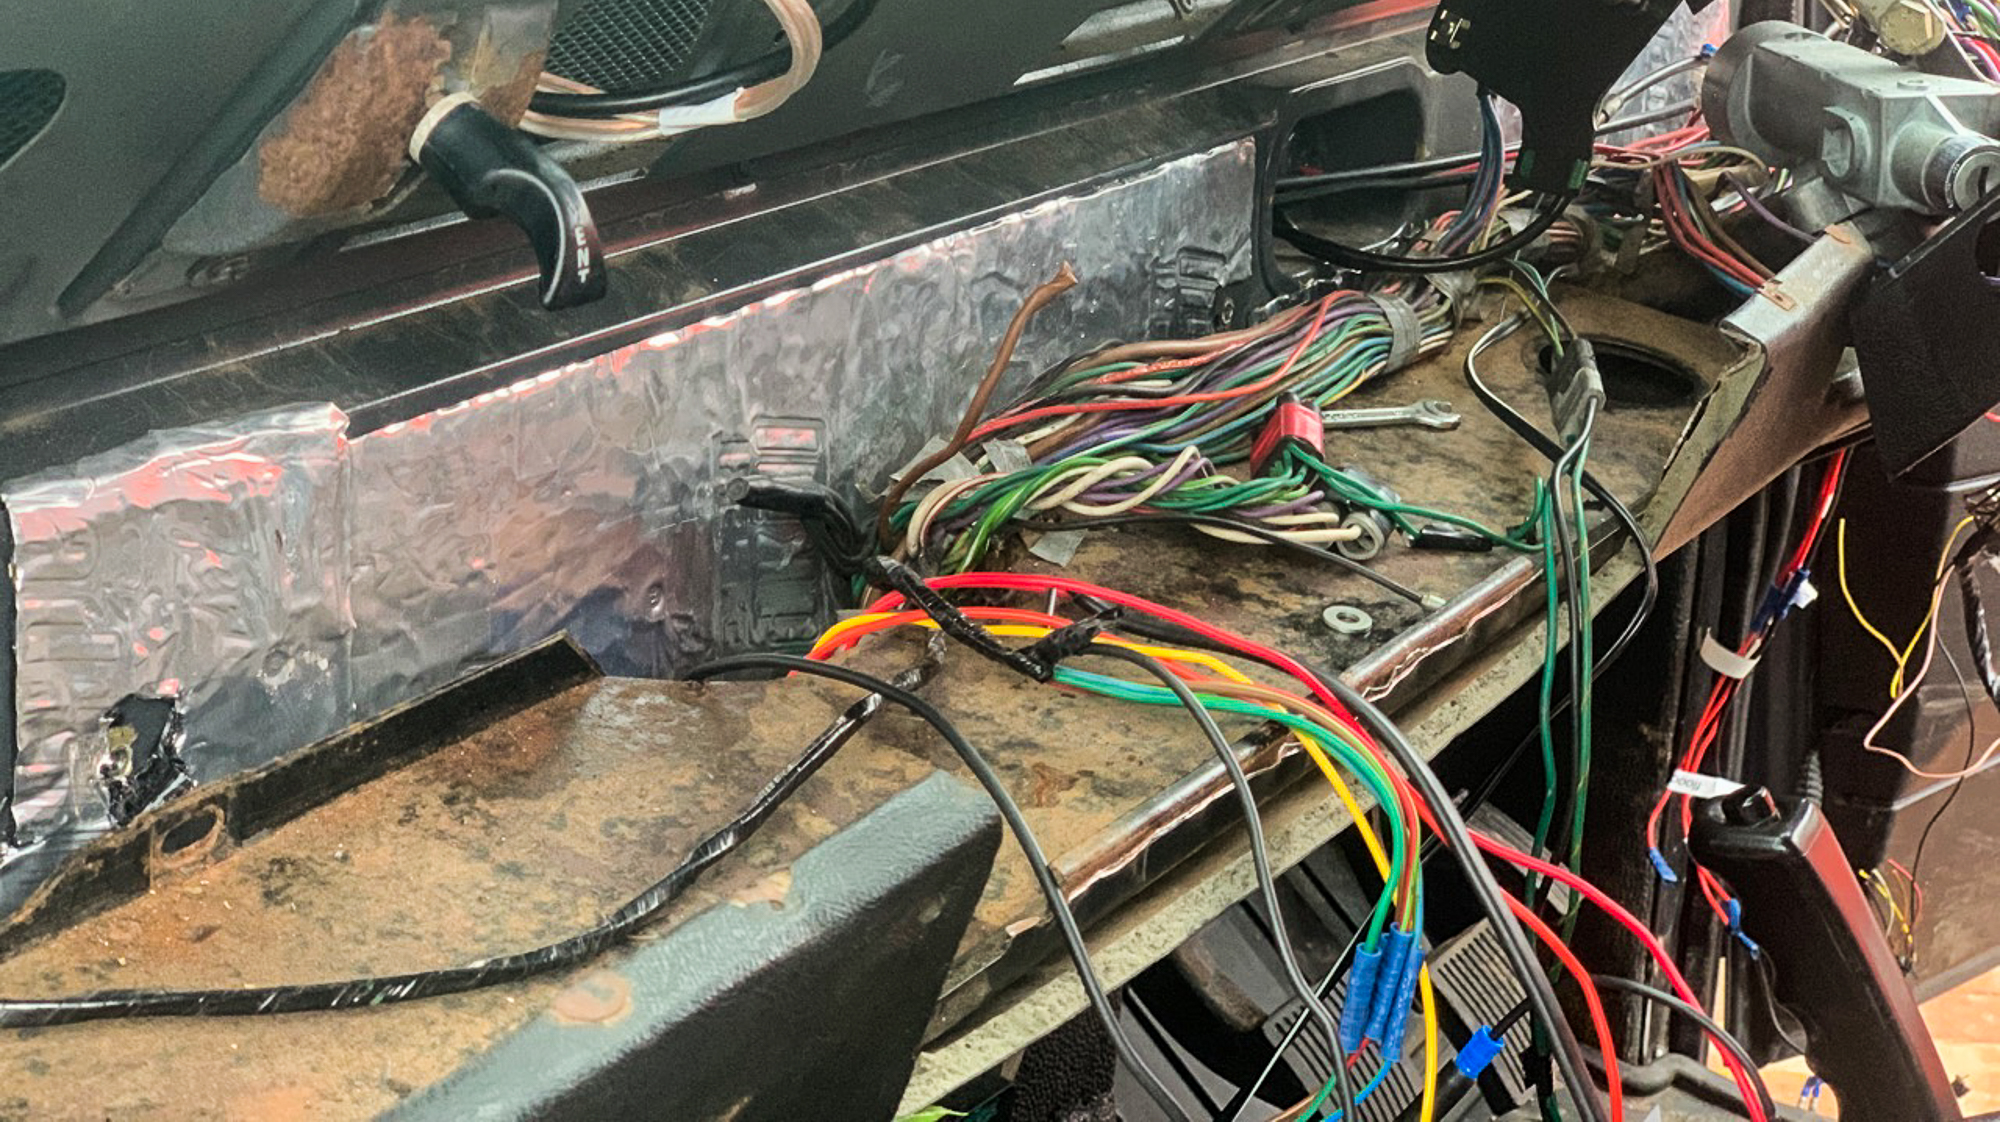
Note that everything is wired into multi-plugs to make the removal of the bottom section easy. The small holes in the bottom of the binnacle in the top picture will house LEDs to illuminate the footwells.

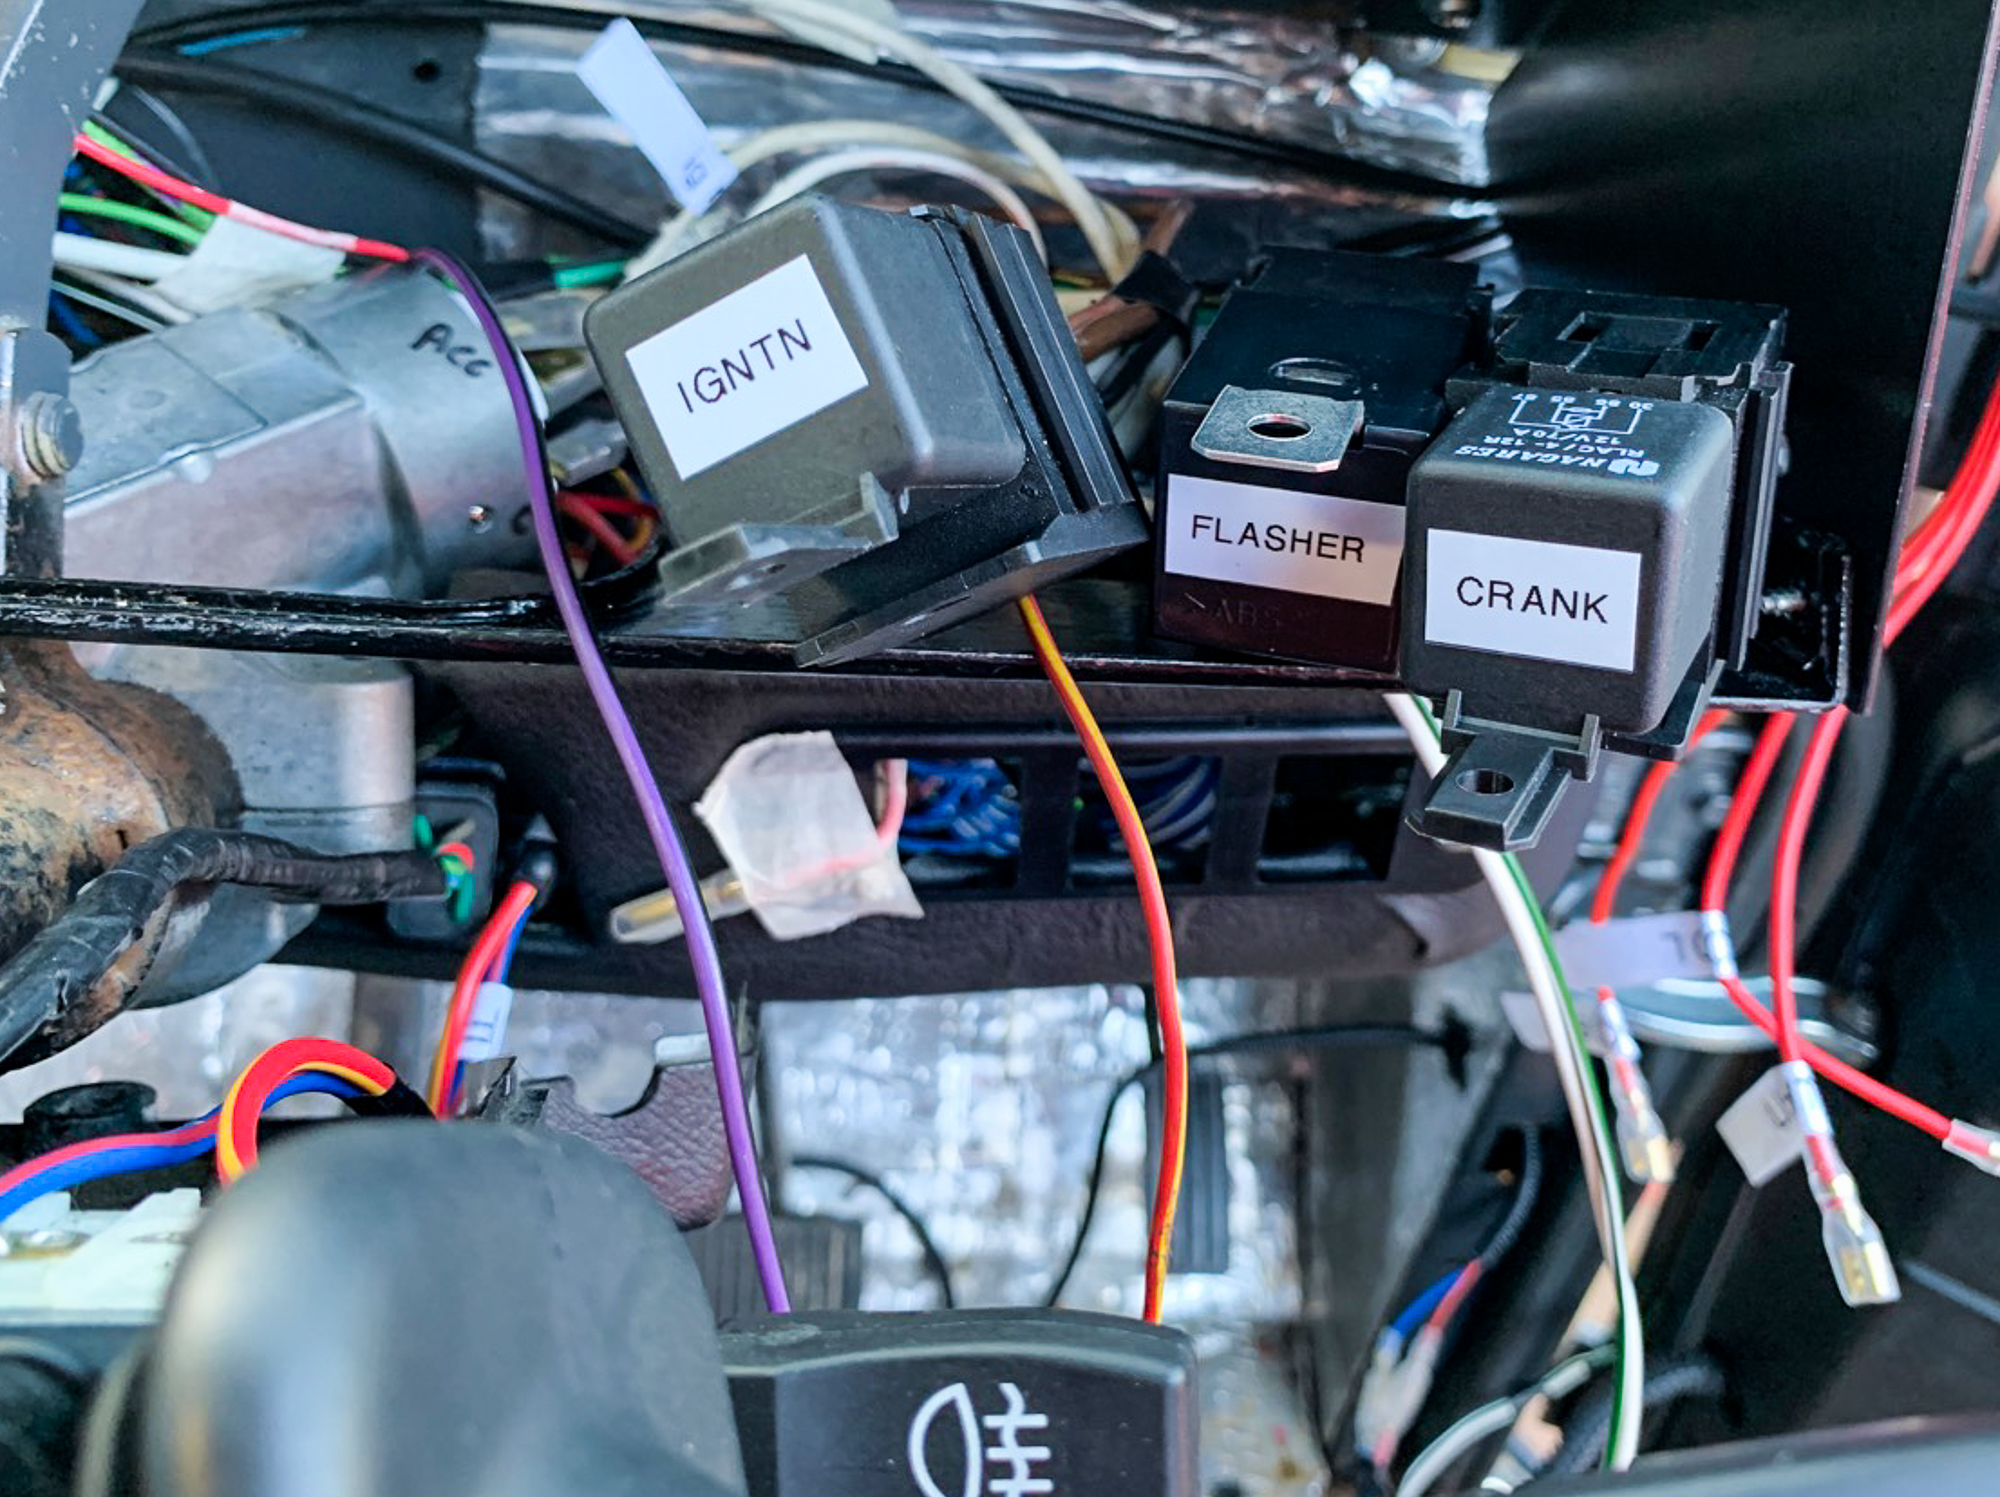
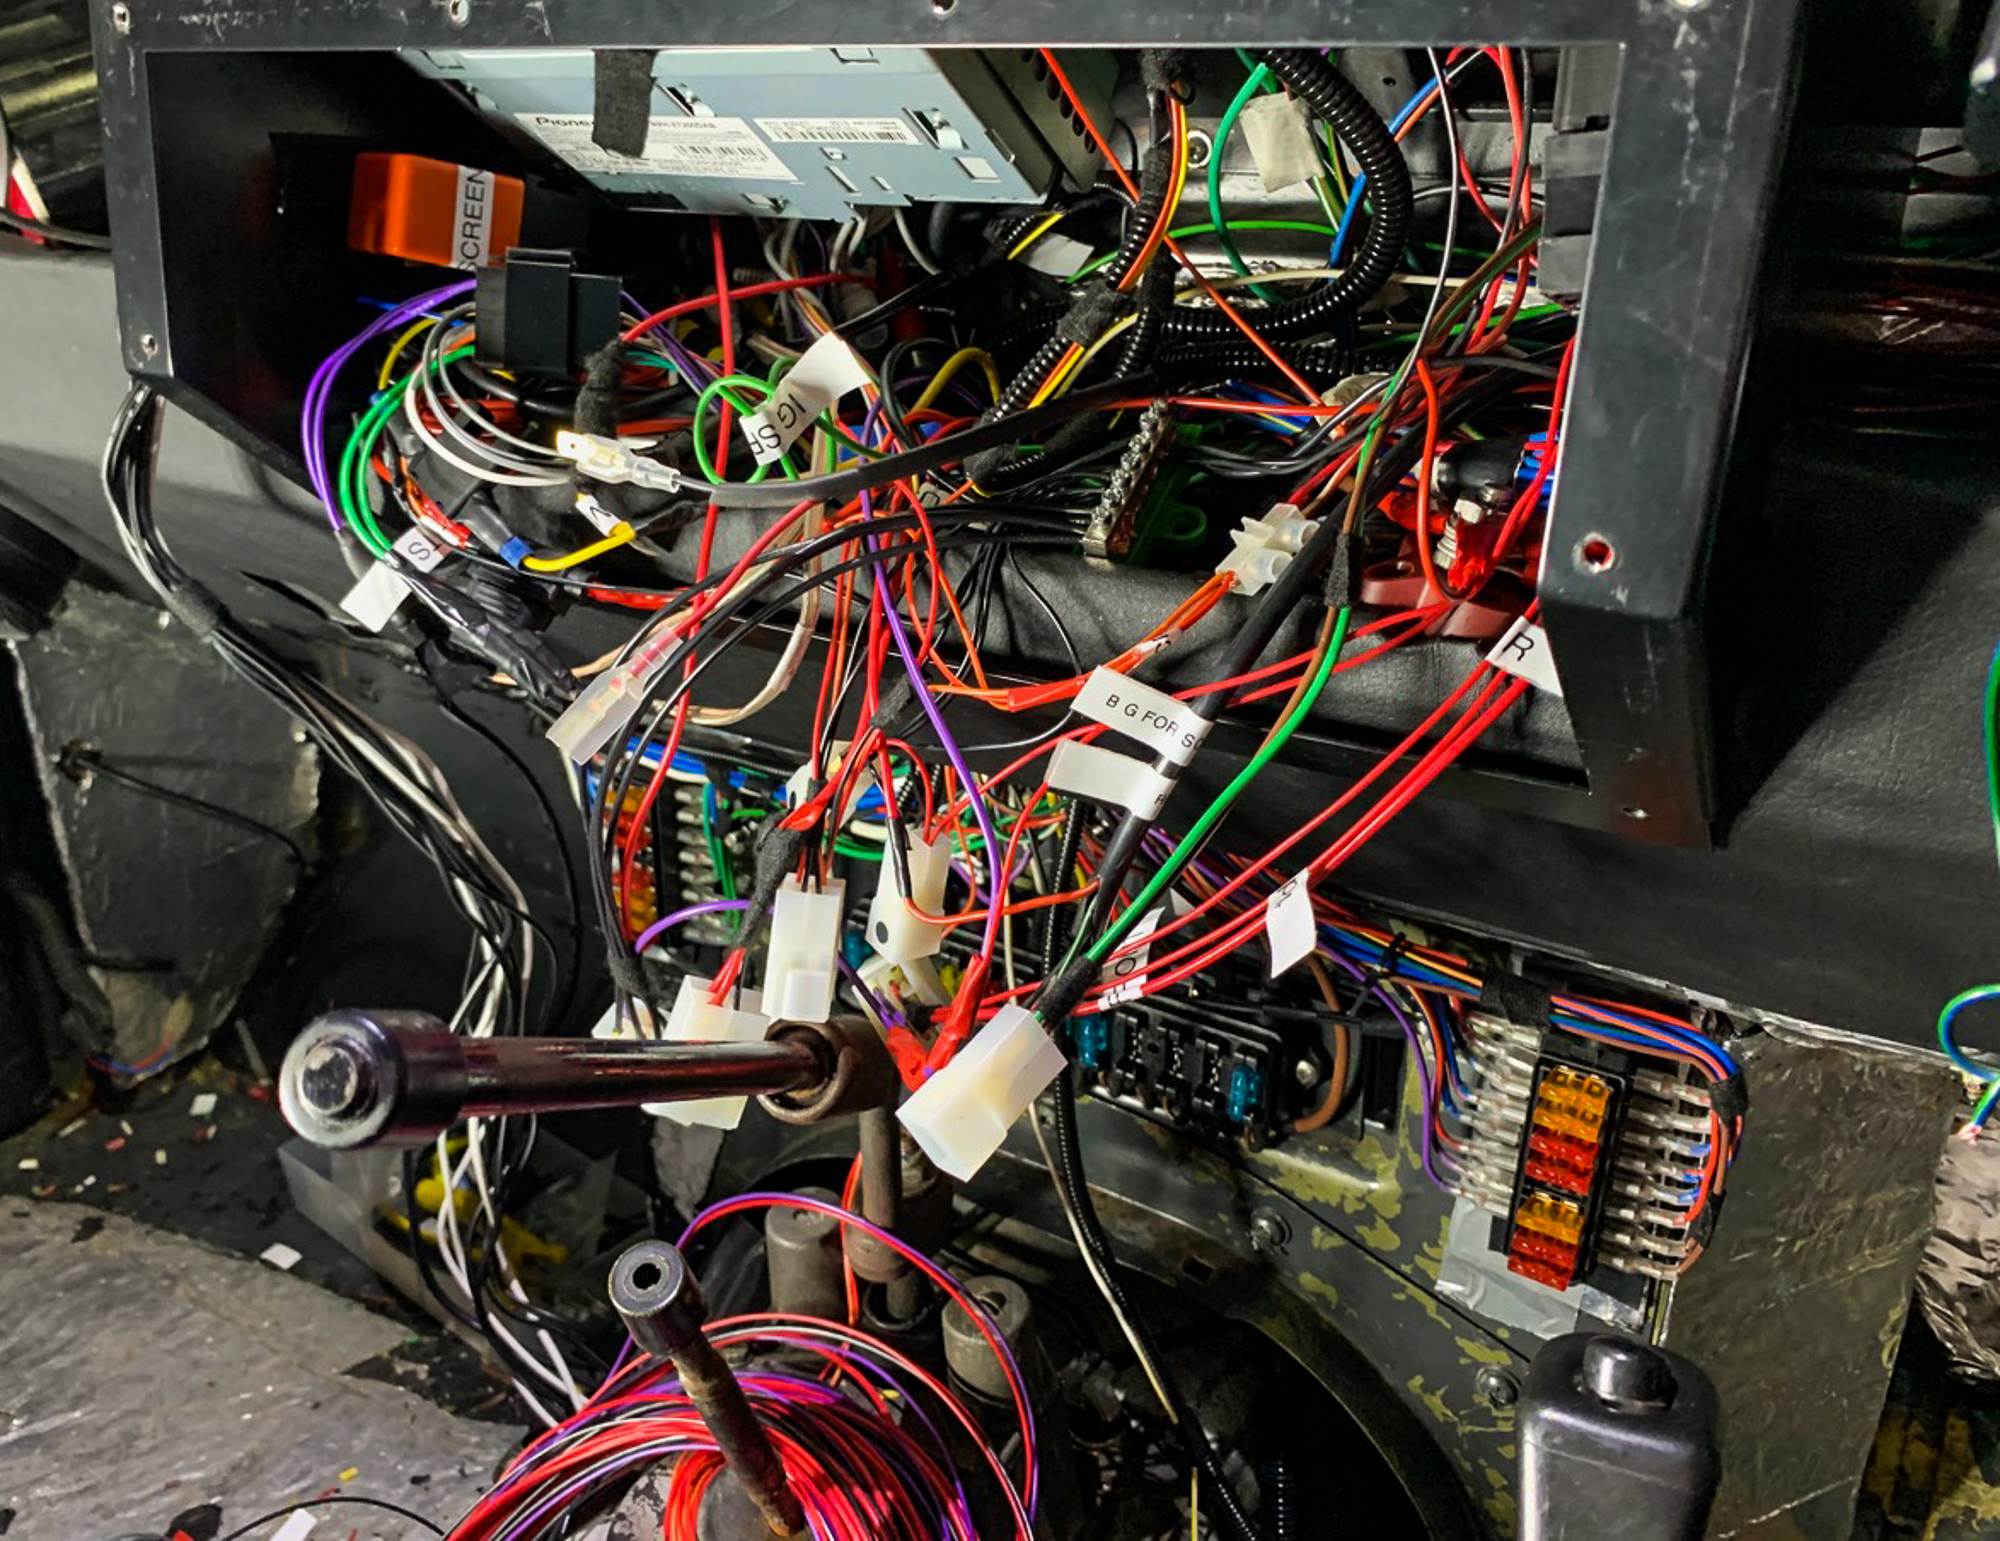
All starting to come together, lots of wires but everything labeled and I have a separate schedule that details wire colours and fuse numbers for every circuit.

At this stage all of the main circuits had been tested and were working fine. Most of the instruments had been wired up. but the speedo, fuel gauge need to be tested along with the warning lights.

But that is for another day as I have to landscape a garden and build a log cabin; and of course deal with the lock-in!

I hope everything still works when I get back to it……………

Planning the re-wire and a moan about some Auto-Electricians

After having deciding that the Perentie needed a complete re-wire I thought that I would take some professional advice before proceeding.

I am no auto-electrician, but competent with a wiring diagram and a pair of crimpers. However, I needed someone to help me get started given that nothing was fused correctly or run through relays. I also wanted to build in additional circuits that I would need in the future. So the search for an Auto-Electrician began……………….

I wanted someone mobile as I wanted to do most of the work myself and I did not want the Perentie languishing in someones workshop for weeks on end with costs spiraling. I turned to Google expected a list of people to call, but I was disappointed.

It seems that where I am, Auto-Electricians are a dying breed. Whilst there are people around with flash workshops who are happy to diagnose faults and do engine ECU upgrades and a bunch of people that just want to do Entertainment Systems – not a lot else. I found three, one via Facebook none of which answered the telephone or replied to voice mails or e-mails. I asked around at at my friendly local garage and got two of the same names and a warning that “they were not great” – fills you with confidence.

Eventually I spoke to one guy who was not interested without a wiring diagram for every connection. As a last resort I posted on the local Facebook Group and one of the same names came up again, I just replied to the post saying that I had tried him but to no avail and within 30 mins got a call from him………….

An appointment was duly booked and we looked at the job together and I ran through my requirements. He was with me for nearly 2 hours during which time I was regaled with stories of all of the rich and famous people that he worked for locally. The job was apparently no problem, I would make up the basic looms for the front to start with, remove the existing wiring and he would return in two weeks to start the job – all booked in the diary.

I was happy as I had wasted a couple of weeks trying to find someone and we were heading for the end of the year.

Preparing to build the loom

Well, you will not be surprised to hear that he did not show on the allotted day and did not reply to my telephone and e-mail chasers. I ever said, “if you don’t want to do the job, just say” – no reply. Maybe I was simply not famous enough, or maybe the job was too much like hard work…….

So now a Perentie totally stranded on the drive and it’s nearly Christmas.

The fuel pump returns and wire woes!

Well the fuel pump has returned and is looking good!

Old and newly re-built above, it is almost a shame to put it back on the vehicle.

The service from Darwen Diesels who did the work was fabulous. I posted it off with an old fashioned letter. They called me to confirm receipt the next day and to say that it was going straight into the workshop. Day 2, I get a call saying that the job was done and asking for the grand sum of £65.18 in return, that included postage and a pack of washers. Day 3, I have it back.

Anyway to work and back on the vehicle it goes, easy job, bleed the system again, jump in the drivers seat to fire it up and – Yep, churning and no firing Grrrrrr.

By chance my friend and Land Rover guru Darren was due to call in that morning as he was passing; he arrived at the end of the Grrrrrrrr. After a quick resume of the situation we tried to start her again, Darren reached under the bonnet and bingo we had a Perentie with a running engine. So, what was the problem.

Well, Darren had manually opened the throttle which was not opened fully, thus restricting fuel; so why was this?

In Europe and some states in Australia Diesels are required to have an automatic fuel shut off, rather than a simple manual cable – the shut off is controlled by an EDIC Actuator which is controlled via a relay by the ignition. S0, the actuator was not opening the throttle wide enough.

EDIC Actuator

I started to follow the cables back from the actuator to see if a problem was obvious. Most of the wires were covered in insulation tape which was now beginning to unwrap itself, including a relay which I assumed controlled the actuator.

EDIC Relay

Give it a squeeze and the actuator works, so the badly made and oxidised connections were the crux of the problem as a quick re-wire of the connections proved correct.

Darren at this stage points out that the Glow Plugs are not wired up – the Ozzies don’t bother – don’t need em Mate!

If you have read previous posts you will remember from “Can you smell Burning” that this is not the first wiring issue that has turned up! So I spend an afternoon tracing and and unwrapping cables finding lots of loose ends, some of which are live, and dodgy connections as I go (most just wires twisted together). I trace the ignition wires to behind the dash and find a similar story. Digging deeper, I now realise that it is only the EDIC and the ignition that is running through relays and that only about 8 circuits are fused, despite fuses being present visually in the fuse box. Six of those were the lights Full Beam, Dip Beam and Side lights………Left and Right – Thats safe then!

The discovery of a few cables that were starting to melt made me realise that this was not going to be a quick fix.

Melting Wires and a loose ignition feed (white)

I could not risk even using the Perentie given my discoveries, let alone add the additional circuits that would be needed to take her to the States and re-wiring the rear lights was already on the job list.

With no off of the shelf loom available because of the mixture of Land Rover and Isuzu wiring it would be re-wiring without a safety net.


De-misting and Dashboard trimming

Did I mention that the Perentie did not de-mist the windscreen very well. I probably didn’t because no Land Rover can de-mist or indeed heat the cabin with any degree efficiency. This is because the heaters are completely rubbish.

Basically the heated coolant in the engine permanently flows through the heater box, you don’t turn the flow on and off with the heater. You can of course amend the plumbing to enable this, but it is a fix that is most, often, not done.

The hot air passes into the lower part of what is the dash board, effectively in front of the bulkhead in front of where your knees go!

When you need heat you pull a lever, that pulls a long wire that opens two small flaps one on each side of the car, this allows a very weak stream of warm air to enter the cabin, pushed along by a low powered fan on heater box in the engine bay; if you are lucky some of it may make it to the windscreen up two very basic tubes. part from bad design and a small fan I guess the car is always heating cod airframe the outs so it will never be great. Ultimately I will upgrade the heater box and fan, but not now.

I needed to remove most of the dash to get at the wiring and soon realised that the wires that opened and closed the flaps were not connected inside the lower dash. One flap is connected to the other with a rod, so just the one connection from the lever. There was no easy access so the whole thing had to come out which was a painfully slow job as all of the fixing were rusted in – the dash also looked a sorry state.

If you look closely at the picture top left you will see a brown wire sticking up in the air, this is a permanently live battery feed, that was just hanging around behind the dashboard; with all of the metal sound proofing just behind it as well – an accident waiting to happen.

Anyway, an afternoon with a wire brush and some Hammerite and all is looking much better! Some padding added and new foam on the flaps…….

All I need to do now is the covering, so some more research. This is when I stumbled across Mike at Britannica Restorations based in Canada. Mike is a true Northerner and a old school properly trained mechanic, his You Tube channel has dozens of fantastically detailed videos about how to fix your Landy – you must visit!

So Mike had a couple of videos about how to recover dashboards, with varying levels of success. Following his tip, I sourced some of the 4 way stretch vinyl used by manufacturers. This is the proper stuff and needs to be treated by vinyl sealent (VP1 Primer) before being stuck to the dash itself, not cheap, probably £100 for the vinyl, sealer and adhesive. Benita and I did the covering one Sunday afternoon as it is not a one person job, we made a effort I think.

I attached a new wire, hopefully it will never come off again, as I have no intention of removing the dash ever again as I was also a pain to get back on!

I followed the same procedure with the top dash which had holes drilled through it in the past.

Later, once I have a proper diesel heater fitter, I suggest the I will use this in the winter instead of the inefficient Land Rover system.

Whilst the dash was off, I replaced the windscreen wiper motor, the wheel boxes and the tube to the windscreen washers.

I also replaced the pipework to the windscreen, the originals were not properly sealed into the lower dash, so the air had no chance of making it to the windscreen.

Can you smell something?

OK, so I noticed the the near side rear side light was out, the weather was dreadful so it was a day or so before I got to take a look.

New LED lights had been fitted prior to my ownership, so I must admit I was not expecting problems, also the usual “lets change the bulb” was not going to be an option.

I had already removed the rear mudflap at the rear as it was torn, but there is a metal plate that runs from the mud flap fixing points to the rear cross member, the idea being that it provides some weather protection to the wiring for the rear lights. In this context “some” means absolutely none, a complete waste of metal in my opinion. However, the plate needed to be removed to gain full access to the wiring.

After a good dose of WD40 and 20 minutes of my time, the plate was removed. It could have been worse, at least I did not have to cut any of the bolts off.

Well frankly, I am surprised that any of the lights worked………

There had obviously been a small fire as I was seeing a mass of bare wire wires with no insulation. As I moved the wires so that I could see more clearly, there was a spark, some smoke and a small fire! So a quick battery disconnect was in order.

Once everything was safe I managed to identify each cable, untangle the mess, cut out the damaged section and rejoin the wires with a temporary repair.

There were a couple of cables with bear ends that I isolated for safety.

I checked the off-side wiring for safety, it looked reasonable, so no immediate action needed.

With the battery re-connected all lights were back working perfectly!

Once I have figured out where the loose wires belong, I will remake the rear part of the loom and use waterproof connectors to the lights.

One Chance to See the World

Insta @onechancetoseetheworld